Last Updated on 5 September, 2026 by Elby | The Tasteful Pantry
Simple homemade mixed berry ice cream… what better way to use up berries. The purply pink colour, the flecks of real fruit, and the creamy texture – it’s good in a bowl, in a cone, alongside a dessert, or lets face it… straight from the tub!!
A vibrant berry syrup is folded through a vanilla ice cream base, giving the berry ice cream its signature colour – depending on the berries you use, the colour may vary each time you make it.
More Frozen and Fresh Berry Recipes
- Blueberry Coconut Smoothie
- Raspberry White Chocolate Brownies
- No Bake Raspberry Cheesecake
- Blueberry White Chocolate Scones
- Raspberry & White Chocolate Muffins
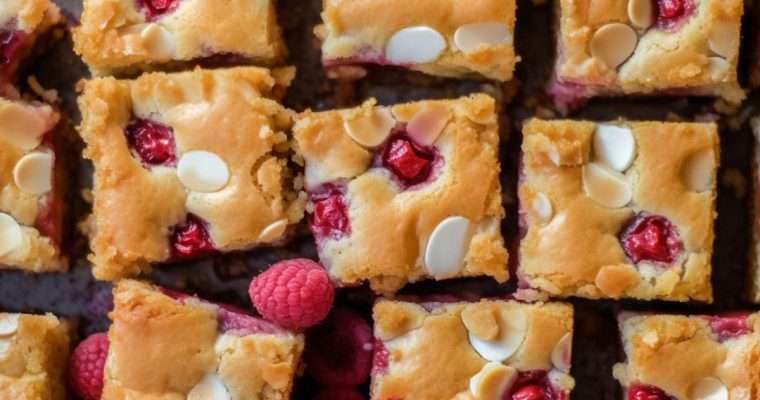
- Raspberry White Chocolate Slice
- Fluffy Blueberry Lemon Muffins
- Chia Pudding with Strawberries and Almonds
Background to the Mixed Berry Ice Cream Recipe
Boysenberry ice cream was my go-to when growing up. If we endured helping mum with a grocery shop, we would sometimes be rewarded with a special ice cream treat at the end. Although I would spend a ridiculous amount of time looking at all the flavours, then umming and aahing over mint choc chip or boysenberry, and without fail ending up choosing the boysenberry. Always so refreshing. And this homemade ice cream recipe now hits that same mark.
After testing countless versions of berry ice cream recipes (I know, it’s a hard life) – with some being too icy, others too sweet – this one finally nails that dreamy texture and balanced taste. The secret lies in creating a thick, jammy syrup rather than just tossing whole berries into the mix. It gives the ice cream a gorgeous flavour of berries throughout.
Benefits Of A Homemade Ice Cream Recipe
This homemade ice cream is more than just a pretty dessert – it’s packed with real fruit, simple to prepare, and endlessly adaptable. Unlike some recipes that simply mix whole berries into the base, or swirl the syrup into the vanilla ice cream, this version simmers the berries into a thick, jammy syrup which is then churned or stirred into the vanilla ice cream. These small extra steps make a huge difference, intensifying the flavour and creating a beautiful magenta coloured ice cream. The vanilla base is egg-free, making it lighter and easier to digest for many people, while still being rich and creamy thanks to the use of thickened cream.
Plus, it works brilliantly with either fresh or frozen berries – no need to wait for the perfect punnet at the shops or to wait for them to come into season. Not only is this homemade ice cream recipe egg-free and nut-free, but it is also naturally gluten-free and vegetarian – it ticks so many boxes.
Homemade ice cream also gives you full control over the sweetness and texture. If you prefer a slightly tangier flavour, reduce the sugar in the syrup, add more berries or add a little lemon juice. Want to use other berries? Go for it. Pick what’s in season, what’s available, or the ones you prefer.
Once you start making ice cream from scratch, you’ll realise just how much more flavour and freshness you can achieve without additives or stabilisers.
Homemade Ice Cream Recipe Ingredients and Equipment
This berry ice cream recipe has two parts: the berry syrup and the vanilla ice cream base. You’ll only need a few staples and some berries, which can be frozen or fresh.
For the berry syrup:
- Blueberries and raspberries: Either fresh or frozen will work. If using frozen, no need to thaw. Not all berries break down equally which is why I blend them first. You can keep all the nutrients from the skins while giving the syrup that deep magenta colour.
- Caster sugar: Dissolves quickly.
- Lemon juice: Brings out the natural tartness of the berries and balances the sweetness. It also helps to thicken the syrup.
- Cornflour: Helps thicken the syrup so it doesn’t make your ice cream too watery.
- Water: Gives the fruit a base to simmer in.

For the ice cream base:
- Thickened cream: The backbone of the texture – use full-fat for the best results.
- Granulated sugar: Sweetens the base and helps create a softer scoop.
- Full cream milk: Balances out the richness of the cream.
- Vanilla extract: Enhances the berry flavours without competing with them.
One of the best things about this list is how simple it is. You probably already have most of these in your kitchen, which makes it a great spur-of-the-moment dessert.
Helpful tools to have on hand:
- Medium saucepan
- Whisk and mixing bowl or jug
- Ice cream maker (great for convenience, but not essential)
- Freezer-safe container (preferably metal, silicon or ceramic)
How to Make Homemade Ice Cream
- Make the berry syrup
Combine the blueberries, raspberries, sugar, lemon juice and water in a saucepan. Stir over medium heat until the sugar dissolves. Let it simmer gently for 5–7 minutes until the berries are soft and the liquid is slightly reduced. Mix cornflour with a tablespoon of cold water and pour it into the pan, stirring constantly until the mixture thickens – about 1–2 minutes. Take it off the heat and allow it to cool completely. You can strain it through a sieve for a smooth syrup, or leave the berries in for a chunkier ripple. - Mix the base
In a large jug or bowl, whisk together the cream, sugar, milk and vanilla until the sugar is fully dissolved. No need to whip – just combine until smooth. - Churn
Pour the base into your ice cream maker and churn according to the machine’s instructions (usually about 25–30 minutes). If you don’t have a machine, skip to the no-churn method below. - Layer the ice cream
Once churned, scoop half the mixture into a freezer-safe container. Spoon over half the berry syrup and use a knife to gently swirl. Repeat with the remaining ice cream and syrup. - Freeze
Cover the container and freeze for at least 1 hour, until firm. This time will vary depending on the ice cream churner and the freezer. - Serve
Let the ice cream soften for a few minutes before scooping. Serve in cones, bowls, or with your favourite desserts.

Serving Mixed Berry Ice Cream
This mixed berry ice cream is delicious on its own, but also pairs beautifully with:
- A slice of Apple Blueberry Cake
- Vanilla Shortbread crumbled on top
- French Toast with Maple Berries
- A stack of Dairy-free Pancakes
- A bowl of warm Apple Crumble
Variations And Custom Twists
- Add texture: Swirl in crushed meringue, chopped white chocolate or slivered almonds for crunch.
- Go tropical: Swap raspberries for mango for a summer holiday twist.
- Create a parfait: Layer the ice cream with granola and Greek yoghurt in a tall glass.
- Make it a sandwich: Scoop between two cookies (Lemon Vanilla Cookies work especially well).
No Churner? How to Make Ice Cream without a Machine.
This recipe also works without a machine:
- Make the base and berry syrup as directed.
- Stir the syrup into the base and whisk together.
- Pour the base into a shallow container, cover with plastic wrap and freeze for 1 hour.
- Stir vigorously with a fork or whisk to break up any ice crystals.
- Repeat every 30-45 minutes for about 3–4 hours. The thicker it becomes, the harder it is to stir.
- Once thickened, to an even semi frozen consistency there in no need to stir any longer. Leave until completely frozen – possibly overnight – before serving.
The texture won’t be quite as airy, but the flavour will be just as indulgent.
Reducing Food Waste
This recipe is perfect for using berries that are slightly wrinkled or too soft to eat raw, but still perfectly good for cooking. The syrup helps preserve the fruit for longer and adds value to ingredients that might otherwise be thrown out.
If you don’t want to include all the syrup in the homemade ice cream, or you made extra, you can freeze the excess in ice cube trays and use it later in smoothies, cocktails, or breakfast dishes – minimising waste and maximising flavour!
Homemade Ice Cream FAQ
Can I use other types of berries?
Absolutely. Blackberries, mulberries, strawberries, boysenberries, or even cherries work well. Just keep the total fruit weight about the same.
Why is my berry ice cream icy?
Homemade ice cream can turn icy if it’s low in fat or churned too slowly. Using thickened cream, a proper sugar balance, and freezing quickly helps minimise this. Ice cream machines definitely help to reduce the chance of forming ice crystals. But if you are making manually and stir often and vigorously once at the freezer step, then you are less likely form any ice.
Can I use low fat cream?
I don’t recommend it. The higher fat content helps to reduce iciness and provides that delicious, creamy texture.
Do I need to strain the berry syrup?
No, but you can strain it if you dislike raspberry or blackberry seeds. Blend and cook the syrup first, then press it through a fine sieve while it is still warm.
Why is my homemade ice cream so hard?
Homemade ice cream doesn’t contain the same stabilisers as many commercial varieties. Let it stand at room temperature for several minutes before scooping. Storing it in a shallow container also helps it soften more evenly.
How can I create a berry swirl ice cream?
Yes. Layer the cold syrup with the freshly churned vanilla ice cream in your freezer safe container, rather than pouring it into the churner. Gently swirl it once or twice before freezing.
Can I make it without an ice cream machine?
Yes. Freeze the base in shallow containers and whisk it thoroughly every 30–45 minutes as it sets. Add the berry syrup during the final mixing stage, then freeze until firm.
Feedback And More: Have you given the mixed berry ice cream recipe a go? I’d really love to know how it was. Select a star rating ⭐⭐⭐⭐⭐ or leave a comment below to share your thoughts. Cheers, Elby!
Try serving the mixed berry ice cream or some chocolate peanut butter ice cream between some homemade biscuits for a delicious ice cream sandwich.
Follow me on Instagram, Facebook and Pinterest for more tasty ideas and new recipes from The Tasteful Pantry.

Mixed Berry Ice Cream
*Note: Adjusting servings will not adjust the ‘light grey’ quantities
Equipment
Ingredients
Syrup
- 100 grams blueberries - fresh or frozen
- 100 grams raspberries - fresh or frozen (see notes)
- 50 grams caster sugar
- 2 tsp lemon juice
- 2 tsp cornflour
- 1 cup water
Ice Cream
- 360 ml milk
- 250 grams white sugar - granulated
- 20 ml vanilla extract
- 720 ml cream - thickened
Instructions
- Prepare your ice cream churner as per instructions. Some will require the bowl to be frozen before use, which will mean planning ahead.
Syrup
- Blend all the syrup ingredients until smooth.
- Pour into a small saucepan and simmer rapidly until the mix thickens and reduces slightly. The syrup will look like a thick coulis.
- Pour the coulis into a jug, cover and place in the fridge (or freezer, but don't let it freeze) until completely cooled. You may need to discard a layer of skin before using, if it has formed on top of the syrup. Don't start the ice cream steps until the syrup is ready to use.
Ice Cream
- Whisk the milk and sugar vigorously in a large bowl, until the sugar has dissolved.
- Add the vanilla and cream and whisk to combine.
- If not already done, turn the churner on and pour the cream mix in and leave to churn for approximately 20-30 minutes – this will vary depending on the brand and type of churner.
- When the ice cream has thickened (a bit firmer than a soft serve consistency), pour in the berry syrup and churn for a further 2-3 minutes. The syrup will colour the ice cream – ie. it won't be a swirl effect.
- Once the ice cream has incorporated the syrup (there can still be strips of vanilla ice cream if you like that effect), turn the churner off and scrape the ice cream into a freezer proof container.
- Freeze for a further hour or until the ice cream has reached your desired consistency (see notes).
Notes
Nutrition
*Nutrition and calorie figures are estimates only.