Chocolate Zebra Cookies

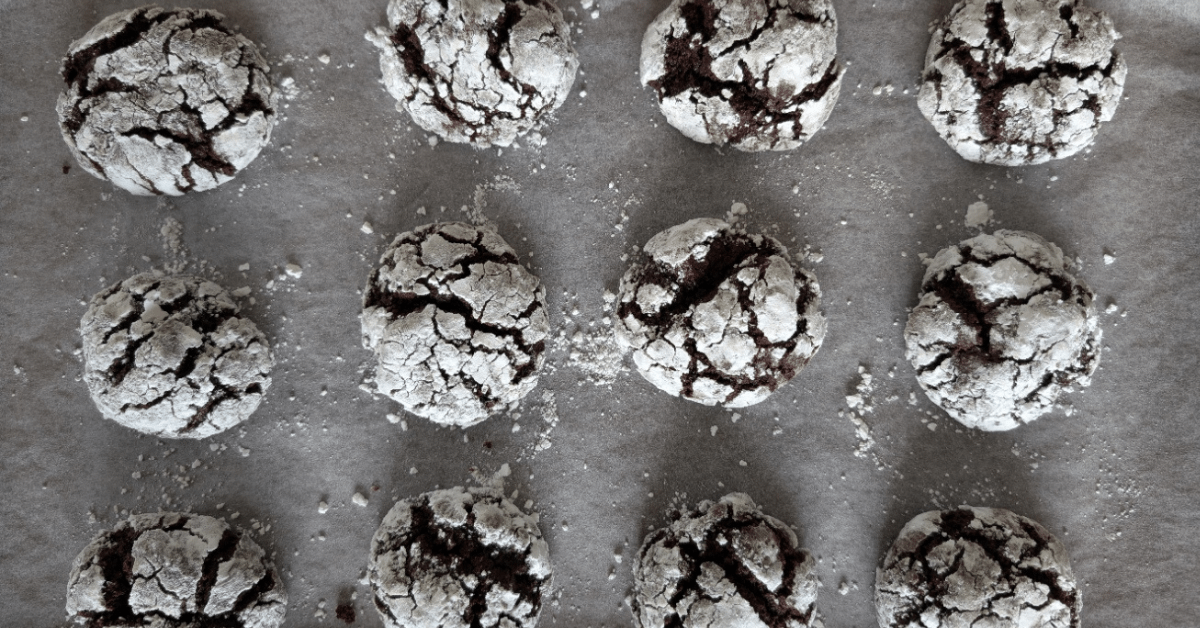
Chocolate Zebra Cookies are my version of brownies in a cookie, chocolate crinkle cookies or chocolate crackle cookies. But regardless of what you call them, they are damn delicious! These cookies are crisp and cracked around the edges and rich and slightly fudgy on the inside like a brownie. Perfectly indulgent, but also look AMAZING, with a stunning crackly icing sugar crust that gives them their signature zebra-striped look.
If you’re a fan of brownies and biscuits, then Chocolate Zebra Cookies are about to become your new favourite treat.
What Makes Chocolate Zebra Cookies Special?
Chocolate zebra cookies are a visual and flavourful delight. As they bake, the dough spreads and cracks, creating a marbled effect. They retain white patches of icing sugar, but with strips of chocolate cookie peeking through – hence the name. The outer layer is slightly crisp, thanks to the icing sugar, while the inside remains soft, and intensely chocolatey. They’re perfect for tea-time indulgence, festive celebrations, or whenever you’re craving something extra special.
Making Brownie Style Cookies
Step 1: Mix
Combine the ingredients in a bowl (all bar the icing sugar)
Step 2: Refrigerate
Line two baking trays with baking paper. Drop spoonfuls of the mix onto the trays and refrigerate for 30 minutes.
Step 3: Shape and Coat (the chocolate zebra cookies effect)
Pour the icing sugar into a flat bowl (eg. pasta bowl). Remove from the fridge and roll the dough between your hands to form balls. Drop the balls into the icing sugar – do half of the tray at a time. Then roll each ball generously in the icing sugar, ensuring an even and complete coating. Place the balls back on the trays approximately 4cm apart. Repeat with all biscuits and return the trays to the fridge.
Step 6: Bake to Perfection
Preheat your oven to 190°C | 170°C fan-forced. Bake for 10-12 minutes or until the cookies have spread and developed their signature crackly crust. Let them cool on the trays for a few minutes before transferring them to a wire rack to cool completely.
Tips for Perfect Chocolate Zebra Cookies
- Chill the Dough: Chilling the dough is crucial for achieving the right texture and preventing the cookies from spreading too much during baking.
- Generous Coating: Roll the dough balls in plenty of icing sugar to ensure a bold contrast and beautiful crackly appearance.
- Storage: Store the cookies in an airtight container at room temperature for up to a week – if they last that long!
Chocolate zebra cookies are the perfect fusion of indulgence and elegance. The deep cocoa flavour satisfies any chocolate craving, while the crackled surface makes them almost too pretty to eat (almost!). Whether you’re baking for a special occasion or just because, these cookies are guaranteed to impress.
Feedback & More
Did you try the Chocolate Zebra Cookies? Let me know in the comments below. Cheers, Elby!
If you liked this recipe, check out some of my other delicious biscuits. Also, follow The Tasteful Pantry on Instagram, Facebook and Pinterest for all the latest recipes and info.
Peanut Choc Chip Cookies
Cooks in 30 minutesDifficulty: EasyA crisp outer biscuit with a soft centre. The peanuts add a nice savoury twist to the classic choc chip cookie.
Best Triple Choc Brownies
Cooks in 70 minutesDifficulty: EasyBrownies sit somewhere in between chocolate cake and fudge. The slightly gooey centre with chunks of milk and white chocolate make these brownies a decadent treat.
Salted Caramel Slice
Cooks in 115 minutesDifficulty: EasyThe classic three layered slice with a coconut biscuit base, smooth salted caramel filling and topped with chocolate.


